Home Assistant: Boot Raspberry Pi from USB SSD
I'm a geek and got infected with the "smart home" virus. I bought a smart doorbell, smart cameras, smart TV, smart outlets, smart buttons, smart thermostats… A ton of devices in my home are now smart. Yet, it hardly feels like living in the future.
Instead, I feel like a modern caveman running around with my phone in hand, trying to remember which app controls which device. Oh, and god forbid that these "smart" devices work together. Oh, no. Every device lives in its ecosystem, isolated from the rest.
Enter Home Assistant
Luckily, a colleague introduced me to Home Assistant. An open-source home automation tool that you can run locally. They have over 1500 integrations and allows you to bridge the gaps between different smart home platforms. Creating automations that works across ecosystems? No biggie!
Hass.io + Raspberry Pi + MicroSD
At this point I was pretty convinced, so I grabbed a Raspberry Pi that I wasn’t using and installed hass.io onto it.
It was straightforward to get the install going, but I wasn't pleased with the performance**. The more devices I added, the more the interface started to lag. It would take a while to load the history or to display my dashboard.
After analyzing the load on the system, I released that the poor performance was due to slow I/O performance. The microSD card in the Pi couldn’t keep up.
USB boot
To fix this, I thought about buying an external SSD and boot from that instead. The documentation on this is a bit hazy. Many people say a Pi can boot from USB, but that hass.io doesn't support it. Others say everything works in the same way as with a microSD card.
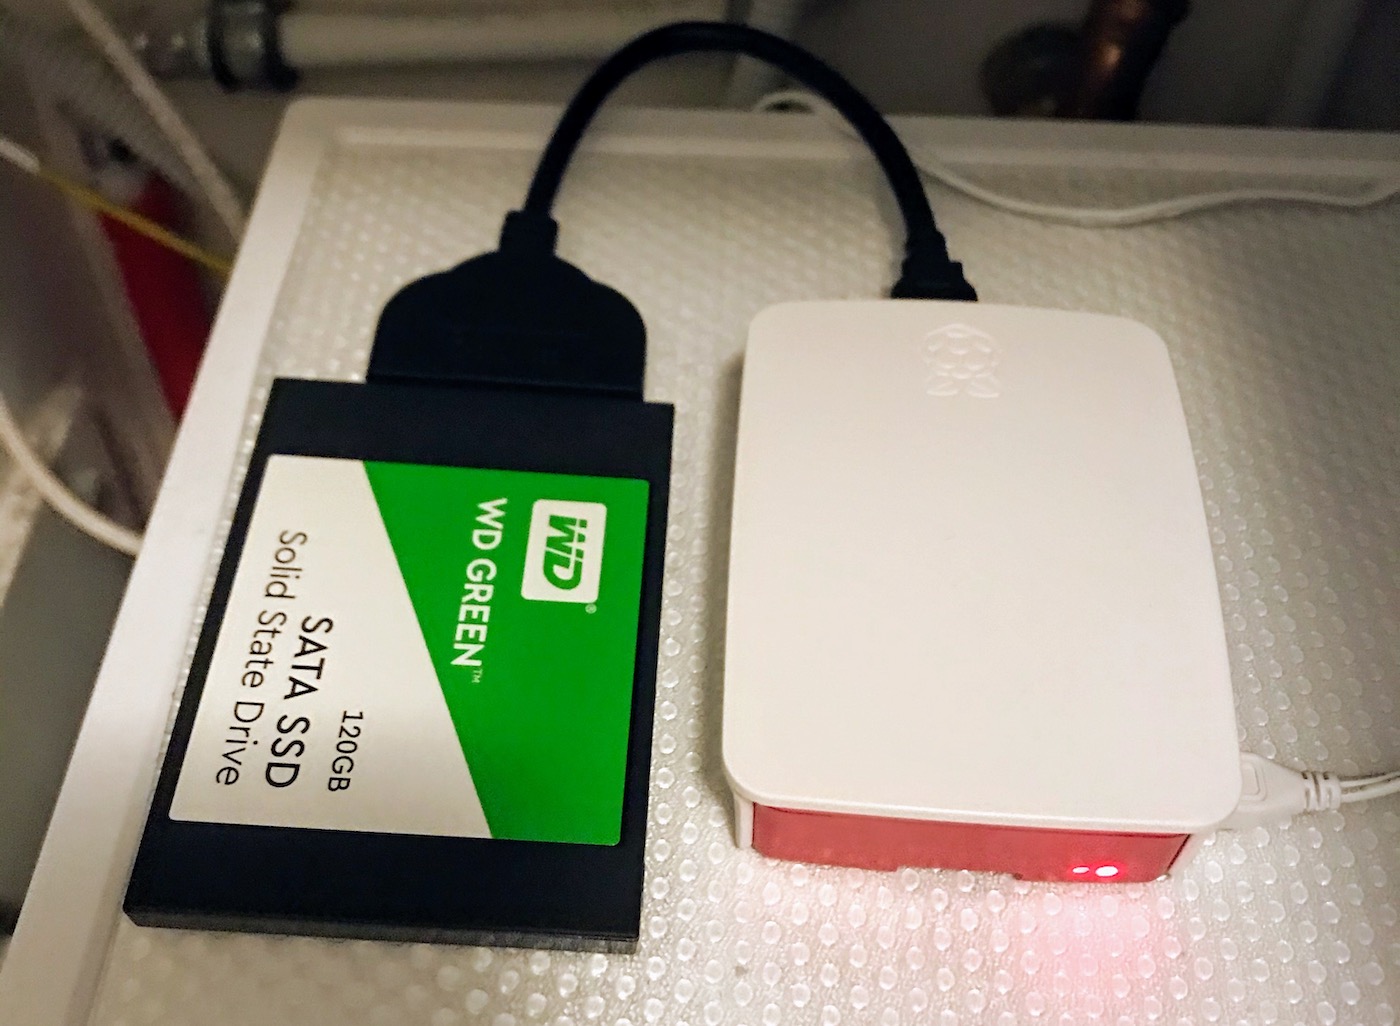
I decided to wing it and buy a WD Green 120GB SSD and a cheap SATA to USB cable. I really wanted Home Assistant, and if the Pi wasn’t able to boot from USB, I’d buy an Intel NUC and put the SSD in there instead.
USB boot is available straight away on the Pi 2B v1.2 and 3B+. The 3A+ and 3B models also support booting from USB devices but require you to activate the feature first. Instructions can be found on the official website.
Luckily, I have a 3B+ model, so no additional work was required on my end. Your mileage may vary.
The rest of the setup was surprisingly easy and didn't require anything different compared to the official install documentation. All I did was:
- Download the latest version of hass.io from the Home Assistant website
- Plug in your SSD
- Use a tool like balenaEtcher or ApplePi Baker to flash the hassio image
- Wait for it to complete
- Plug the SSD into your Raspberry Pi
- Remove the microSD card (silly, I know)
- Power up your Pi!
The Pi now takes a bit longer to boot because it first tries to access the empty SD card slot. But after around 10 seconds, the green light on the Pi comes to life as it boots from the SSD. Yay! I gave it a couple of minutes to install all the components and I was up and running again.

Getting WiFi to work
During the installation, I used an ethernet cable to connect the Pi to my network. Normally you can put your WiFi credentials on a little USB drive. Home Assistant checks for this every time it boots up but this didn’t work for me.
So I did the installation over ethernet and configured my WiFi connection afterward. To make the stick, follow these instructions:
- Format USB stick in FAT32, give it the name
CONFIG - Create a file on it, called
network/my-network - The contents of this file should look like this:
[connection]
id=my-network
uuid=72111c67-4a5d-4d5c-925e-f8ee26efb3c3
type=802-11-wireless

[802-11-wireless]
mode=infrastructure
ssid=YOUR_NETWORK_NAME

[802-11-wireless-security]
auth-alg=open
key-mgmt=wpa-psk
psk=YOUR_NETWORK_PASSWORD

[ipv4]
method=auto

[ipv6]
addr-gen-mode=stable-privacy
method=auto
Be sure to change the YOUR_NETWORK_NAME and YOUR_NETWORK_PASSWORD 😉. Optionally, you can also configure a static IP address or disable IPv6. More info about this file can be found on this page.
Now plug the USB drive into your (booted) Pi and follow these instructions:
- Connect the USB drive with your WiFi credentials
- Open Home Assistant
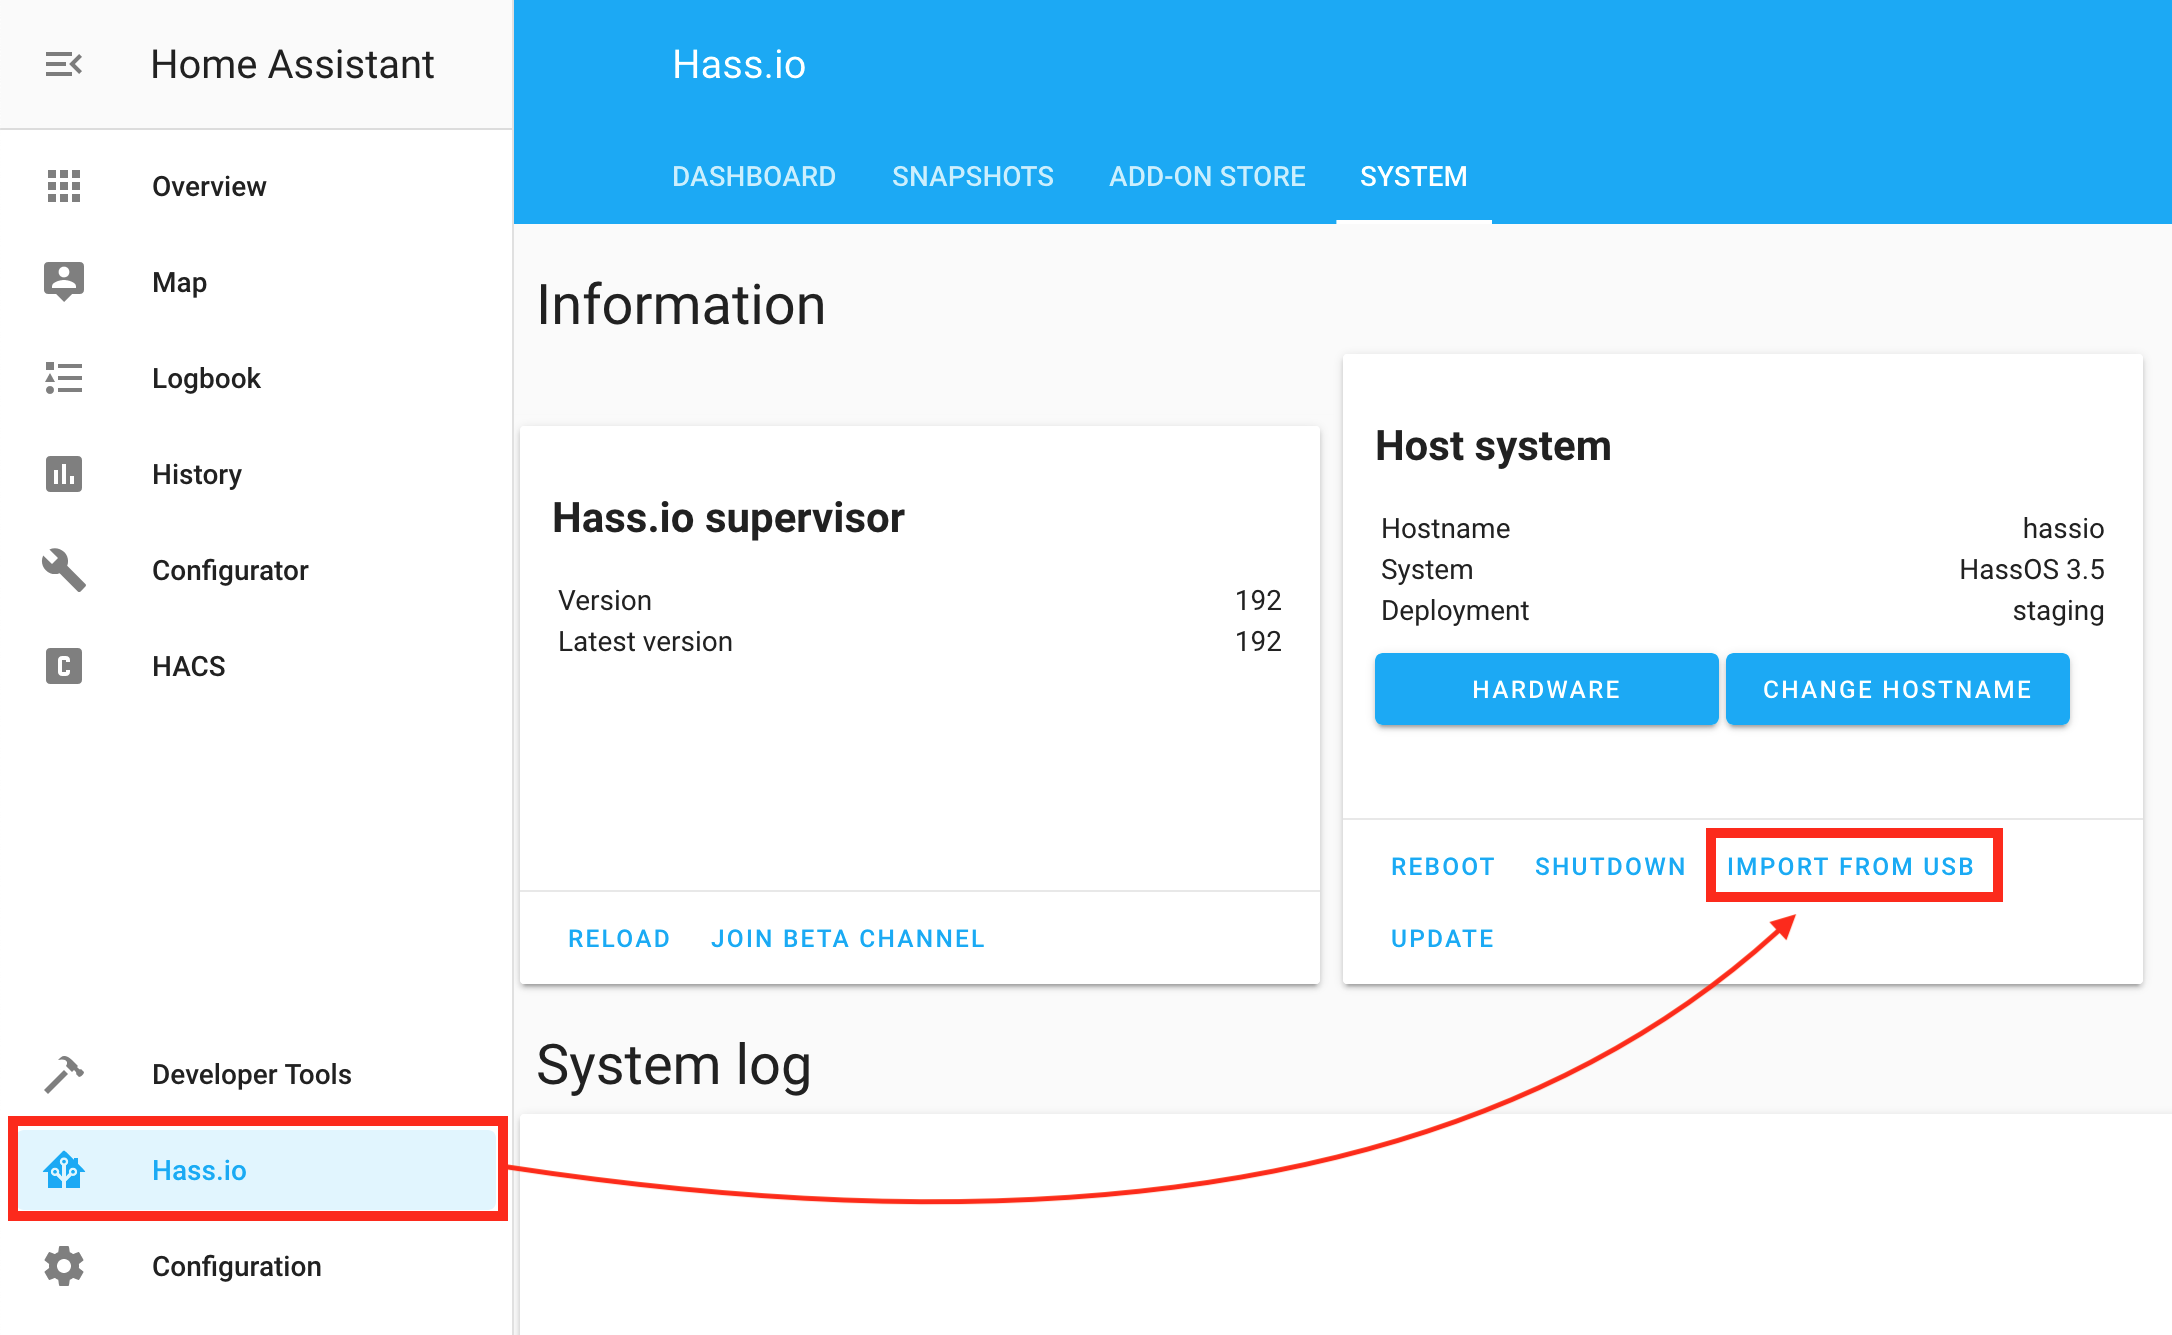
- Click on "Hass.io" in the sidebar
- Under "Host system" click on "Import from USB"

After this, I rebooted the Pi, unplugged the ethernet and saw it come back online via WiFi. Mission accomplished!
Side note: at this stage, the IP address of the Pi will have changed. Make sure to check which new address it got (or use hassio.local:8123 if your router supports mDNS).
Why MicroSD cards suck
You can find a ton of people on the internet complaining about dying SD cards. Especially if they’re used in a Raspberry Pi that is turned on 24/7 and acts as some kind of server.
But that doesn’t mean that SD cards suck. They are designed to store large files quickly. Think cellphones and cameras that take high-resolution photos and 4K video. Performance drops when you want to write a lot of smaller files to a card, and that’s what is happening when you run something like Home Assistant.
(micro)SD cards don’t suck, but in this case, they’re out of their comfort zone.
Raspberry Pi + SSD case
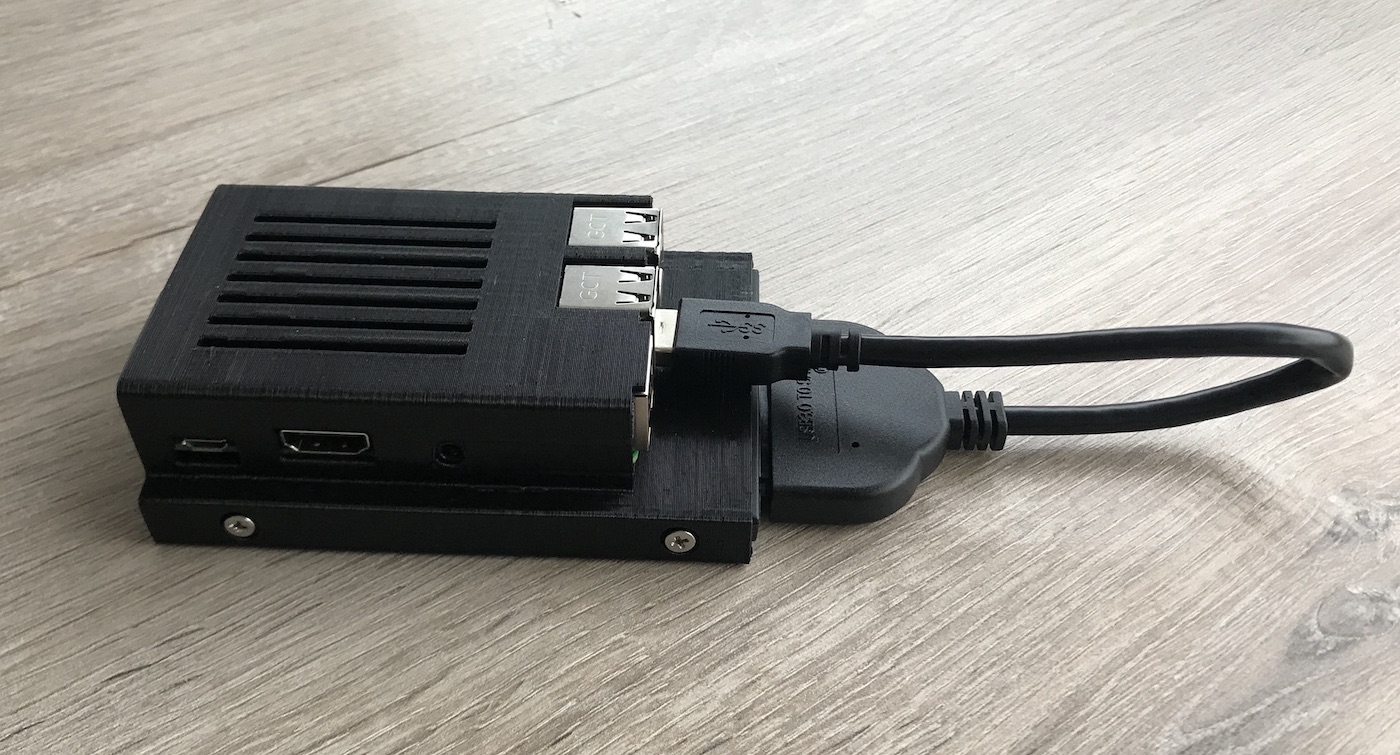
Before wrapping this project up, I wanted to clean up the setup. I found a cool case for the Raspberry that has an SSD slot beneath it on Thingiverse.
5 hours later, my setup looked like this:

Not too bad! I might look for a shorter or angled USB cable in the future, but for now, this is more than adequate.
Automate away!
So that was it. My Home Assistant instance is now running like a dream. As a final tip: move away from Sqlite and install MariaDB as soon as possible. It’ll bring even more performance.
Are you using Home Assistant yourself? Let me know your experiences with it, what automations you have, what hardware you run it on…


